1. On the left menu bar, click on Tour > Create Standard Tour
2. The Basic Data screen will open from here, fill out the following information

a. Type in the Tour Name
b. Product Type can be selected from the drop down menu or you can Click on the + to Add a new Product Type (ex: Special Event, Private Party, etc.)

c. Valid Dates
d. Code is only seen internally and can be a good place to put the event time
e. Departure Time
f. Category can be selected from previously used categories that are listed under Available by selecting the item and Clicking the > to Move it to Selected. Click on the + to Create a new category
g. Accounting Data>Add Tax, Tax1 and Fee, Ticket Note, and Custom Field can be filled in as needed
3. Click Save
4. The Season Information dialog box will appear
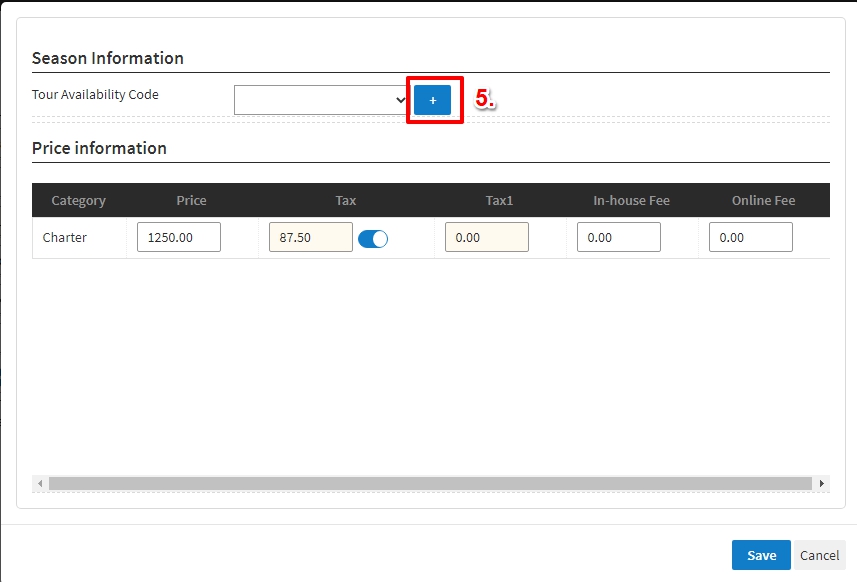
5. Tour Availability Code can be selected from the drop down menu or Click on the + to Create Tour Availability
6. Fill in the Availability Code and the Availability Number
7. Click Save

8. When you see the Success Message appear, fill in the Price for each Category. If Tax or Tax1 is set to other than 0, the Tax allowing it to be added or not to certain categories. Click Save

10. Click on the Web Data tab
11. Under Tour Online Settings, you can check or uncheck the box beside “This Tour is Available for Internet Booking.”
Create a Tour Description to Display Online
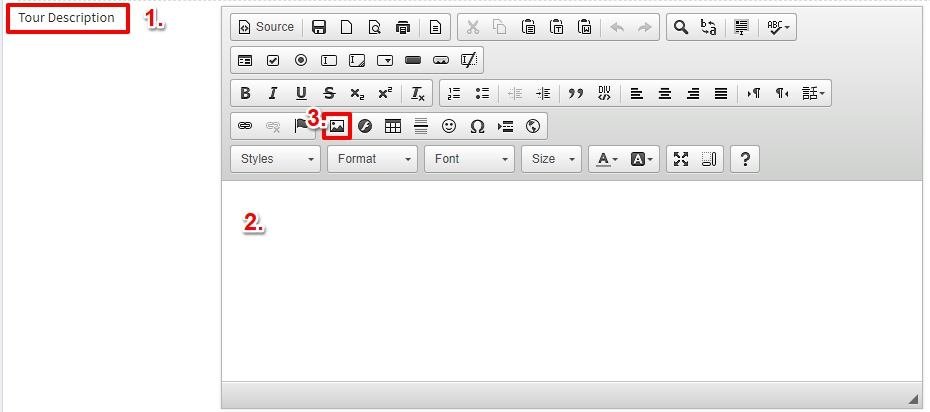
1. Scroll down to Tour Description under the Web Data tab
2. Type in the text you would like to appear online
3. Click on the Image Symbol (shown below) to insert an image
4. The Image Properties Dialog Box will open
5. Click Browse Server
6. Double click on the image you would like to insert
7. Click Ok

8. Click Save
9. Click on Visit Site
10. Find the event you just created on the calendar and click on it
11. You will see the Tour Description you just created in the same way your customers will
